21:15
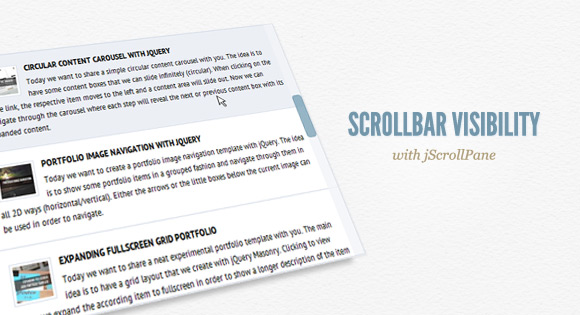
Очень красивый скрол бар исполненный в светлых тонах бувально на днях , это свежэнький скрипт .

Установка:
Подключаем оформление бара (после [head]):
Code
<link rel="stylesheet" type="text/css" href="css/demo.css" />
<link rel="stylesheet" type="text/css" href="css/style.css" />
<link rel="stylesheet" type="text/css" href="css/jquery.jscrollpane.codrops1.css" />
<script type="text/javascript" src="http://ajax.googleapis.com/ajax/libs/jquery/1.6.4/jquery.min.js"></script>
<!-- the mousewheel plugin -->
<script type="text/javascript" src="js/jquery.mousewheel.js"></script>
<!-- the jScrollPane script -->
<script type="text/javascript" src="js/jquery.jscrollpane.min.js"></script>
<script type="text/javascript" src="js/scroll-startstop.events.jquery.js"></script>
<link href='http://fonts.googleapis.com/css?family=PT+Sans+Narrow&v1' rel='stylesheet' type='text/css' />
<link href='http://fonts.googleapis.com/css?family=PT+Serif+Caption:400,400italic' rel='stylesheet' type='text/css' />
<script type="text/javascript">
var _gaq = _gaq || [];
_gaq.push(['_setAccount', 'UA-7243260-2']);
_gaq.push(['_trackPageview']);
(function() {
var ga = document.createElement('script'); ga.type = 'text/javascript'; ga.async = true;
ga.src = ('https:' == document.location.protocol ? 'https://ssl' : 'http://www') + '.google-analytics.com/ga.js';
var s = document.getElementsByTagName('script')[0]; s.parentNode.insertBefore(ga, s);
})();
</script>
После body ставим :
Code
<script type="text/javascript">
$(function() {
// the element we want to apply the jScrollPane
var $el = $('#jp-container').jScrollPane({
verticalGutter : -16
}),
// the extension functions and options
extensionPlugin = {
extPluginOpts : {
// speed for the fadeOut animation
mouseLeaveFadeSpeed : 500,
// scrollbar fades out after hovertimeout_t milliseconds
hovertimeout_t : 1000,
// if set to false, the scrollbar will be shown on mouseenter and hidden on mouseleave
// if set to true, the same will happen, but the scrollbar will be also hidden on mouseenter after "hovertimeout_t" ms
// also, it will be shown when we start to scroll and hidden when stopping
useTimeout : true,
// the extension only applies for devices with width > deviceWidth
deviceWidth : 980
},
hovertimeout : null, // timeout to hide the scrollbar
isScrollbarHover: false,// true if the mouse is over the scrollbar
elementtimeout : null, // avoids showing the scrollbar when moving from inside the element to outside, passing over the scrollbar
isScrolling : false,// true if scrolling
addHoverFunc : function() {
// run only if the window has a width bigger than deviceWidth
if( $(window).width() <= this.extPluginOpts.deviceWidth ) return false;
var instance = this;
// functions to show / hide the scrollbar
$.fn.jspmouseenter = $.fn.show;
$.fn.jspmouseleave = $.fn.fadeOut;
// hide the jScrollPane vertical bar
var $vBar = this.getContentPane().siblings('.jspVerticalBar').hide();
/*
* mouseenter / mouseleave events on the main element
* also scrollstart / scrollstop - @James Padolsey : http://james.padolsey.com/javascript/special-scroll-events-for-jquery/
*/
$el.bind('mouseenter.jsp',function() {
// show the scrollbar
$vBar.stop( true, true ).jspmouseenter();
if( !instance.extPluginOpts.useTimeout ) return false;
// hide the scrollbar after hovertimeout_t ms
clearTimeout( instance.hovertimeout );
instance.hovertimeout = setTimeout(function() {
// if scrolling at the moment don't hide it
if( !instance.isScrolling )
$vBar.stop( true, true ).jspmouseleave( instance.extPluginOpts.mouseLeaveFadeSpeed || 0 );
}, instance.extPluginOpts.hovertimeout_t );
}).bind('mouseleave.jsp',function() {
// hide the scrollbar
if( !instance.extPluginOpts.useTimeout )
$vBar.stop( true, true ).jspmouseleave( instance.extPluginOpts.mouseLeaveFadeSpeed || 0 );
else {
clearTimeout( instance.elementtimeout );
if( !instance.isScrolling )
$vBar.stop( true, true ).jspmouseleave( instance.extPluginOpts.mouseLeaveFadeSpeed || 0 );
}
});
if( this.extPluginOpts.useTimeout ) {
$el.bind('scrollstart.jsp', function() {
// when scrolling show the scrollbar
clearTimeout( instance.hovertimeout );
instance.isScrolling = true;
$vBar.stop( true, true ).jspmouseenter();
}).bind('scrollstop.jsp', function() {
// when stop scrolling hide the scrollbar (if not hovering it at the moment)
clearTimeout( instance.hovertimeout );
instance.isScrolling = false;
instance.hovertimeout = setTimeout(function() {
if( !instance.isScrollbarHover )
$vBar.stop( true, true ).jspmouseleave( instance.extPluginOpts.mouseLeaveFadeSpeed || 0 );
}, instance.extPluginOpts.hovertimeout_t );
});
// wrap the scrollbar
// we need this to be able to add the mouseenter / mouseleave events to the scrollbar
var $vBarWrapper = $('<div/>').css({
position : 'absolute',
left : $vBar.css('left'),
top : $vBar.css('top'),
right : $vBar.css('right'),
bottom : $vBar.css('bottom'),
width : $vBar.width(),
height : $vBar.height()
}).bind('mouseenter.jsp',function() {
clearTimeout( instance.hovertimeout );
clearTimeout( instance.elementtimeout );
instance.isScrollbarHover = true;
// show the scrollbar after 100 ms.
// avoids showing the scrollbar when moving from inside the element to outside, passing over the scrollbar
instance.elementtimeout = setTimeout(function() {
$vBar.stop( true, true ).jspmouseenter();
}, 100 );
}).bind('mouseleave.jsp',function() {
// hide the scrollbar after hovertimeout_t
clearTimeout( instance.hovertimeout );
instance.isScrollbarHover = false;
instance.hovertimeout = setTimeout(function() {
// if scrolling at the moment don't hide it
if( !instance.isScrolling )
$vBar.stop( true, true ).jspmouseleave( instance.extPluginOpts.mouseLeaveFadeSpeed || 0 );
}, instance.extPluginOpts.hovertimeout_t );
});
$vBar.wrap( $vBarWrapper );
}
}
},
// the jScrollPane instance
jspapi = $el.data('jsp');
// extend the jScollPane plugin
$.extend( true, jspapi, extensionPlugin );
jspapi.addHoverFunc();
});
</script>
<script>var ADPACKSSTYLE = "lightVertical";</script>
<script src="http://tympanus.net/codrops/adpacks/adpacks.js"></script>
Стаив туда, где будет скрол бар:
Code
<div class="wrapper">
<div class="content">
<div id="jp-container" class="jp-container">
<a target="_blank" href="http://tympanus.net/codrops/2011/09/20/responsive-image-gallery/">
<img src="images/thumbs/16.jpg"/>
<div>
<h3>Responsive Image Gallery with Thumbnail Carousel</h3>
A tutorial on how to create a responsive image gallery with a thumbnail carousel using Elastislide. Inspired by Twitter's "user gallery" and upon a request to show an integration of Elastislide, we want to implement a responsive gallery that adapts to the view-port width. The gallery will have a view switch that allows to view it with the thumbnail carousel or without. We'll also add the possibility to navigate with the keyboard.
</div>
</a>
<a target="_blank" href="http://tympanus.net/codrops/2011/09/12/elastislide-responsive-carousel/">
<img src="images/thumbs/15.jpg"/>
<div>
<h3>Elastislide - A Responsive jQuery Carousel Plugin</h3>
With the responsive awakening in web design it becomes important to not only take care of the visual part of a website but also of the functionality. Elastislide is a responsive jQuery carousel that will adapt its size and its behavior in order to work on any screen size. Inserting the carousels structure into a container with a fluid width will also make the carousel fluid.
</div>
</a>
<a target="_blank" href="http://tympanus.net/codrops/2011/09/05/slicebox-3d-image-slider/">
<img src="images/thumbs/14.jpg"/>
<div>
<h3>Slicebox - A fresh 3D image slider with graceful fallback</h3>
With the CSS3 3D transformations we can create some neat effects by transforming elements in three-dimensional space. Slicebox makes use of the 3D transforms properties and allows different kind of effects. The main idea is to create three-dimensional image slices that will rotate and reveal the next image as another side of the 3d object. In case the browser does not support 3D transformations, a simple slider will be used as fallback.
</div>
</a>
<a target="_blank" href="http://tympanus.net/codrops/2011/08/30/automatic-image-montage/">
<img src="images/thumbs/13.jpg"/>
<div>
<h3>Automatic Image Montage with jQuery</h3>
Arranging images in a montage like fashion can be a challenging task when considering certain constraints, like the window size when using fullscreen, the right image number to fill all the available space or also the size of the images in use. With the following script you can automatically create a montage, either for a liquid container or a fixed size container (including fullscreen), with the option to fill all the gaps.
</div>
</a>
<a target="_blank" href="http://tympanus.net/codrops/2011/08/23/image-zoom-tour/">
<img src="images/thumbs/12.jpg"/>
<div>
<h3>Image Zoom Tour with jQuery</h3>
Today we want to share a little zoom tour script with you. Showing a main image initially, we want to be able to zoom into certain parts of the image by clicking on tags, using another image for the closer view. This next step can contain other tags that again allow to show more images.
</div>
</a>
</div>
</div>
Из прикрепленного архива заливаем все файлы в соответствубщие папки css, js, images
